4 Channel Baby Animal Preamp - Finished!

GroupDIY Audio Forum

Help Support GroupDIY Audio Forum:

This site may earn a commission from merchant affiliate links, including eBay, Amazon, and others.

druedger

Well-known member
Joined
Jul 30, 2004
Messages
70
Just thought I would share with you all my latest creation.  I built 4 channels of Baby Animal pres and racked them in a single rack.  I built the face plate myself using lazertran decals and some candy apple red paint and topped it off with 2 or 3 layers of clear coat after the decals were applied.

There are 2 channels of JLM99v preamps and 2 channels of Hybrid preamps with the OPA2604 and toggles on the front panel to switch them between Class A and Class AB on the Hybrid opamp.  All outputs are transformer balanced using some vintage Jensen JE-123s transformers, and each output has a volume pot that acts as a fader similar to Neve preamps that let you overdrive the opamp gain and dial down the output level with the output volume pot.  It's a really nice feature.  All of the inputs are on Neutrik combo jacks that provide both XLR mic inputs and line level TRS imputs from the same connector.  The front panel has a 20 db pad, a 48 volt phantom switch and a blue LED that lights when phantom power is active.  The only difference between the pictures I took and the finished unit is that the power supply had to be removed because it was inducing hum into the 2 channels closest to the transformer.  I replaced this with an external 48v switching power supply, and it is completely noise free now.

I just tried these out on a recording session on drums, and the JLM99v pres sound fantastic on overheads.  Lots of detail and very full sounding.  The hybrids sounded great, too.  All in all, I love these pres a lot.

BA4-Front-small.jpg


BA4-FrontDetail-1.jpg

BA4-FrontDetail-2.jpg

BA4-FrontDetail-3.jpg


BA4-Top-1.jpg


BA4-Top-2.jpg


BA4-back.jpg
 
only thing bothering me is the lockwashers that are a little to big behind the front switches. but i'm a tad on the perfectionist side  :D

thing look great man. awesome job!!  8)
 
looks useful.
asm beat me to it--the lock-washer marshall has returned--those lock washers go on the other side of the front panel.
How did you do the legend-label?
 
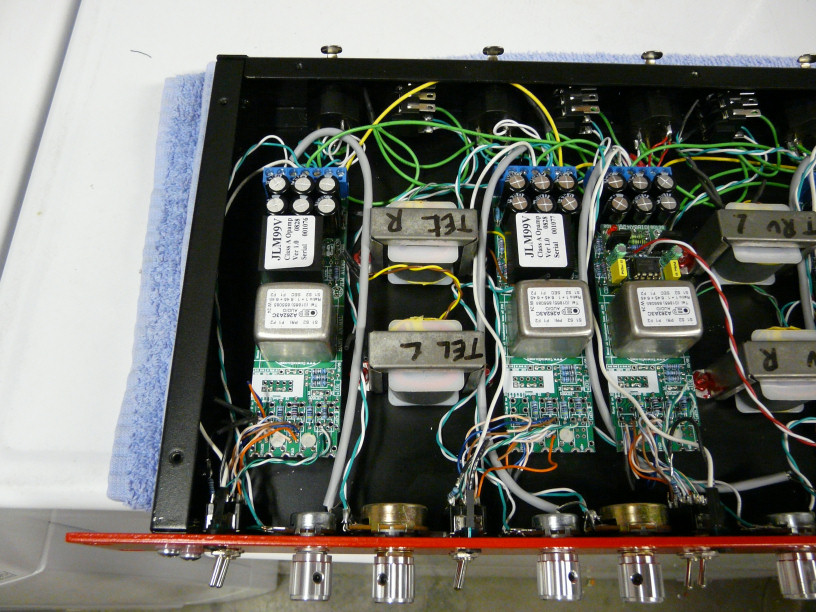
Yeah, I would prefer the lock washers on the other side too.  The problem is the flat washer is grooved for these toggles, and I wasn't paying attention when I soldered them up.  So some of them would have had the tab lip pointing in the wrong direction.  It probably would have been OK, but it would have bugged me.  Plus, those flat washers are much larger than the lock ring, and I thought it looked too big for the switch.  Aesthetically it just didn't float my boat.  Now if I could source some thin washers about the size of those lock washers...heaven.

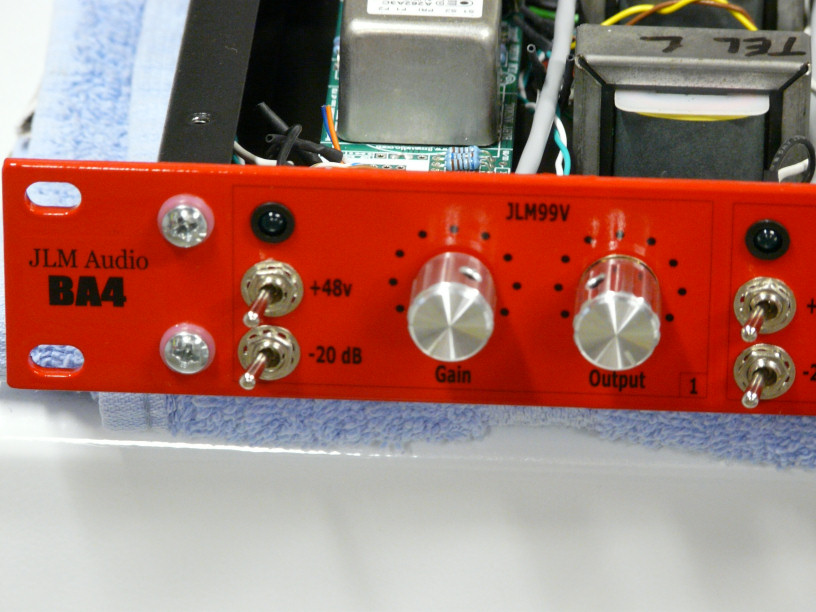
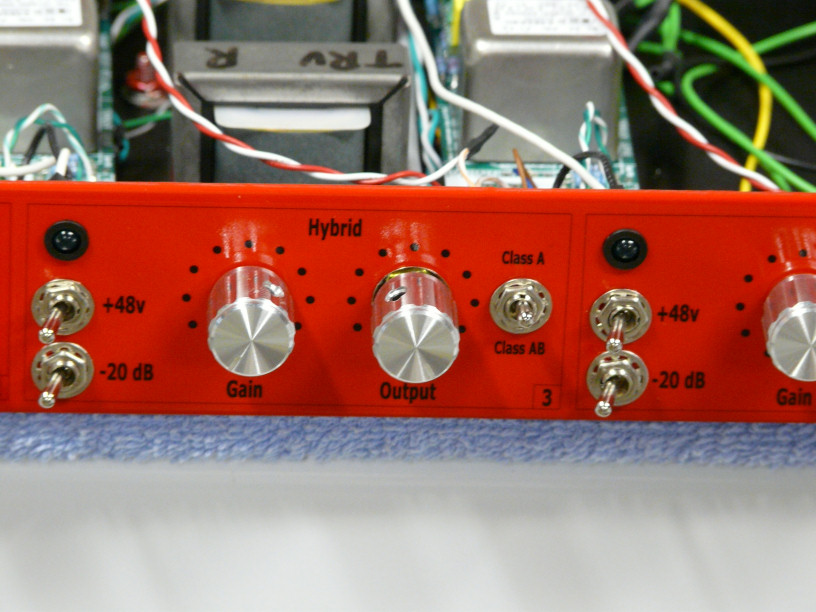
The front panel is all decals over a painted surface using Rustoleum enamel paint from Home Depot/OSH.  I've gotten pretty good at spraying my panels, so this method works really well for me until I can find a decent silkscreening place that doesn't charge an arm and a leg for a panel like this.  I mean when the panel costs more than the case, something is definitely wrong with that picture.  Plus, I like the fact that I stuck to a true DIY and produced something that's pretty close to silkscreen results.

If anyone's interested, here's the process for doing the panels:

Design a layout in a CAD tool (I use DesignCAD, which is made by the same guys that do TurboCAD)

Print out the layout and overlay it on the front panel

Mark the holes with a punch

Drill the panel.  I usually do square cutouts with a Dremel tool and lots of patience.

Prepare the front panel by sanding it lightly with 320 grit sandpaper.  This roughs the surface up a bit and will allow the primer to adhere better.

Wipe down the panel with some acetone to remove any dust and ensure it is clean.

Spray the back portion of the panel with primer.  Wait 20 minutes for it to dry to the touch and spray another coat of primer.  Make sure you get the sides fully coated.

Wait 20 minutes and turn the panel over.  Now spray the front panel.  Wait 20 minutes and spray another coat of primer.

Now you let it sit for 24 hours so the primer fully cures.  After it cures, examine the front for any imperfections.  If there are any, then lightly sand them out with 320, and spray another layer of primer.  Wait 24 hours before doing the color coat.

After 24 hours, now we shoot the color.  Start with the back of the panel first.  This time I only spray one coat of color because it's not as important as the front.  Be sure to get the sides covered nicely as this will be important when shooting the sides for the front.  If it doesn't cover properly at this point, it will be easier to chip when finished.

After 20 minutes, turn the panel over and spray the front of the panel.  Wait 20 minutes and spray the second coat of color.

Wait 20 minutes more and spray one pass of clear coat.  This layer should be fairly thin and is just enough to seal the top color coat.  It's important to have one layer of clear prior to the decal application as it will blend better when spraying the final clear coats after the decals are applied.

Let the panel site for a full 24 hours.  This will ensure that the paint has fully cured before going to the next step.

Now apply the decals.  I typically do them in sections so it is easier to work with.  I also print the decals with a guide in the holes so I know where the center is supposed to be an can use it to align everything properly.  After you apply the decal, use some paper towel to remove any excess water and smooth out any bubbles that may have formed under the decal.  Once all the decals are applied and there is no residual water for the process, set the panel aside and let it dry.  I usually apply the decals in the early evening and let it sit overnight.  In the morning everything will be fully set.

With the decals fully dried use an exacto knife to cut out the guide markers from the decals so that the holes are fully exposed.  The decal will be nice and taught, so cutting the hole is fairly simple.  Push down any exposed edges with the butt end of the knife, and use your pinky to push in the decal edges so it adheres to the inside of the hole you just cut.  Once you have all the holes cut out, you're ready to shoot the final clear coat layers.

We don't care about the back of the panel for the final clear coats, so just put the panel up with the decal side exposed.  Spray a single clear coat.  Wait 20 minutes and spray the final clear coat.  If it looks like there are still some spots that are not smooth, then wait another 20 minutes and spray a 3rd clear coat.  I usually only do 2 final clear coats, but I have done 3 on some panels.  It just depends, and it's really a matter of taste.

Let the panel sit for 24 hours so the clear coat is fully cured, and you're done!  The whole process takes about 3 - 5 days depending on prep work and whether you make any mistakes in the process.  The key thing to keep in mind is to keep your workspace clean.  Any bit of dust can and will find its way onto your panel when you're spraying.  If you take your time and follow these guidelines, you'll get really excellent results without too much hassle.  And the final cost is the best part.  The primer, color and clear cans of paint coats about $12, and the lazertran decals are about $2 a sheet.  So for $15 you get a really nice panel.  Not bad for a week of work.

Last tip: don't be too hasty to shoot the color or clear coats.  If you don't wait the full 24 hours before going to the next step, shooting the paint will cause wrinkling and bubbling because the under layer has not fully cured.  What happens is the solvents in the new layer dry faster than the ones in the under layer, and this has the effect of pulling the underlayer up, much like sucking liquid through a straw.  The net result is you'll be stripping the panel down and starting over, and that is something you definitely want to avoid.  Between the lacquer thinner to remove the paint and sanding to prep the panel for the primer layer again, it will add another day to the process.  Best to avoid if at all possible.
 
Nice job - as everyone says, panel looks great.

My only comment is that you may also want to experiment on one of those channels with the JLM input tranny. Its cheap and easy but I found the frequency extension on the JLM blew me away and I really wasn't expecting that at all, so much so that I dont use the OEP or Lundahl channels that I also built as much as the one with the JLM input.
 
OK.  I had a chance to use these on a recording session, and all I can say is Wow!  I really liked the JLM99V on kick and snare, and the Hybrid in Class AB mode was awesome for toms.  I think both the Hybrid and JLM99v are fantastic for the Baby Animal, and I could get great results with either of them quite frankly.  They are really nice sounding.

Now on a mic'd guitar cabinet I had a chance to compare these pres to an API 312 clone, a racked pair of vintage MAP27 pres (precursor to API and having a similar topology to the API 312), a Presonus M80, an ART MPA Gold modified with NOS Philips 12AT7 tubes, a racked pair of Auditronics 110 modules and a vintage pair of Neve 1272 preamps.  In the end I preferred the sound of the Neve preamp to all of them as it had the most clarity and presence of all the pres and had just a little extra smoothness without getting mushy that made them my personal favorite.  However, I really liked the 99v and Hybrid as well with the 99v having a slightly warmer sound compared to the Hybrid, and the Hybrid edging out the 99v for edgier guitar parts with lots of string detail and chunk.  I would use either of them in a heartbeat if my Neve was unavailable.  In fact, I preferred the sound of both the 99v and the Hybrid to the API 312 clone.  Surprisingly the Auditronics was the closest sound to the Neve pre, but it was a little grittier sounding when the guitars kicked in heavy.  The JLM pres never had any harshness or fuzziness when the guitars got really distorted, whereas the Auditronics had a little bit of fuzz in the distortion. 

I tracked everything through a Fostex D2424, and the amp I used was a Groove Tubes Soul-o Single with a 6L6 Tube Amp Doctor tube in the power stage and an Electro Harmonix 12AX7 and Groove Tubes 12AX7M Mullard Reissue tubes in the preamp stage.  The cabinet was mic'd with a single SM-57 on the 12 inch speaker.  If I get some samples up on my website this weekend I'll send out a link in a future post.

I like these so much that I'm thinking about building another 4 channels and using the JLM input transformer as suggested by deuce42.  You can't beat these pres for the value.  I wish I had built these before my API clones as I wouldn't have built them as a result.
 
Hi

I am in the process of researching and planning my first DIY preamp build.  I am planning to go with something from JLM.

I am looking into 3 options, BA4 kit with 99v Opamp and two input transformer variations (maybe JLM14 and OEP262AC3) with the JLM111 output transformers, a 2 channel 1290 kit, and/or a 2 channel Dual99v kit. I'm not sure which one to go with yet, but I'm just trying to find out everything I can before I make a purchase.

I am curious about your BA's with the output trim pot...how did you achieve this?  I thought this feature was only available on the 2 stage pres like the 1290 or Dual99v. If I can achieve this feature on a BA build with variable input Z and a VU meter I'd be very pleased. What PCB did you build you pres on? The BA or BAD? Are they single or dual gain stage?

Do you have any experience with the 1290 or Dual99v kits? Or any advice on the advantages (both sonically and features wise) these may have over the single stage BA kits?

Any advise you can give me on this would really help me to make my decision on which kit to go with. I am itching to get started but want to make sure I make an informed decision before jumping in.

I love the look of your BA4, by the way, by far the best looking JLM build I have seen so far in my research, very nice work!

Thanks in advance for your advice and time.
 

Latest posts

Back
Top